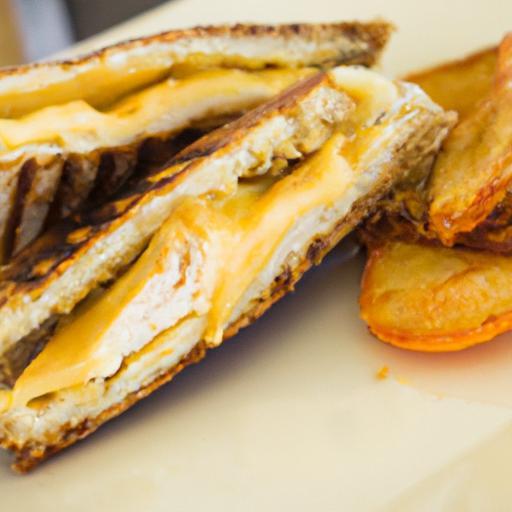
In the world of quick, satisfying meals, few kitchen gadgets shine quite like the humble panini press. But beyond toasted sandwiches and melty cheese lies a culinary secret: mastering the art of grilling chicken to juicy, flavorful perfection-fast. Whether you’re a busy cook craving efficiency or a flavor seeker looking to elevate your weekday dinners, unlocking the potential of your panini press can transform ordinary chicken breasts into tender, smoky masterpieces. Join us as we delve into pro tips, foolproof techniques, and sizzling secrets to achieve panini press perfection-because fast doesn’t have to mean flavor lost.
Choosing Your Panini Press for Fast, Even Chicken Grilling
Panini Press Perfection starts with selecting a panini press that delivers quick and consistent heat. Opt for a model with adjustable temperature settings and non-stick grill plates; these features ensure your chicken cooks evenly without sticking or drying out. A press with a floating hinge accommodates thicker cuts, ideal for juicy chicken breasts or thighs. The weight and clamping pressure matter, too-too light, and your chicken won’t caramelize properly; too heavy, and you risk pressing out all the juices.
Prep and Cook Time
- Preparation: 15 minutes (including marinade time)
- Cooking: 8-12 minutes, depending on thickness
- Total: 25-30 minutes
Yield
Serves 4 hungry guests
Difficulty Level
Easy to Medium – perfect for beginner to intermediate home cooks
Ingredients
- 4 boneless, skinless chicken breasts (pounded to 1/2 inch thickness)
- 1/4 cup olive oil (extra virgin for robust flavor)
- 3 cloves garlic (minced)
- 2 tbsp fresh lemon juice
- 1 tbsp Dijon mustard
- 1 tsp smoked paprika
- 1 tsp dried oregano
- Salt and freshly ground black pepper to taste
- Fresh herbs (such as thyme or parsley, for garnish)
Instructions
- Marinate the chicken: Combine olive oil, minced garlic, lemon juice, Dijon mustard, smoked paprika, oregano, salt, and pepper in a shallow bowl. Whisk until emulsified. Add chicken breasts and turn to coat evenly. Cover and refrigerate for 10-15 minutes to infuse flavors.
- Preheat your panini press: Set to medium-high heat (around 375°F/190°C). Allow the plates to heat thoroughly for even grilling.
- Prepare the chicken: Remove the chicken from the marinade, letting excess drip off. Pat lightly with a paper towel if too wet to avoid steam during grilling.
- Grill the chicken: Place chicken breasts on the press. Close the lid gently but firmly-avoid pressing too hard to keep juices inside. Grill for 5-6 minutes on the first side, then check.
- Flip and continue grilling: If your press doesn’t rotate, carefully flip chicken using tongs and grill for an additional 4-6 minutes until internal temperature reaches 165°F (74°C). For presses with floating lids, rotate chicken if needed for even grill marks.
- Rest the chicken: Remove from the press and let rest 5 minutes under foil. This step locks in juices and enhances tenderness.
Tips for Success
- Marinating time: While 15 minutes works for a quick flavor boost, marinate up to 2 hours for deeper infusion without acid overpowering texture.
- Even thickness: Pound chicken breasts uniformly to ensure simultaneous cooking and perfect grill marks.
- Use a meat thermometer: Avoid guessing doneness. Perfectly grilled chicken is juicy and safe at 165°F (74°C).
- Experiment with marinades: Try a honey-soy glaze or a spicy chipotle rub to switch up flavors.
- Clean your press: Wipe plates between batches to prevent bitterness from burnt bits and maintain vibrant grill lines.
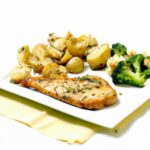
Serving Suggestions
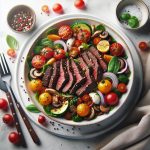
Slice the chicken crosswise into tender ribbons and serve atop a bed of crisp arugula or mixed greens drizzled with balsamic glaze. Garnish with fresh parsley, lemon wedges, and a light dusting of smoked paprika for vibrant color. Pair with crusty toasted ciabatta or inside a warm panini with melted mozzarella and sun-dried tomatoes for a fulfilling sandwich. For a low-carb option, serve alongside grilled vegetables and a tangy yogurt dip infused with herbs.
| Nutrient | Amount per Serving |
|---|---|
| Calories | 280 kcal |
| Protein | 42 g |
| Carbohydrates | 2 g |
| Fat | 10 g |
For more creative chicken recipes and grilling tips, see our Grilled Chicken Recipe Collection and explore expert advice from Food Network’s Grilling Guide.

Q&A
Q&A: Panini Press Perfection – Mastering Chicken Grilling Fast
Q1: Why use a panini press for grilling chicken instead of a traditional grill?
A1: A panini press is like having a personal grill and sandwich maker all in one! It combines top and bottom heat for even cooking, locking in juicy flavors while cutting grilling time dramatically. Plus, it’s perfect for indoor cooking-rain or shine, you can enjoy perfectly grilled chicken in minutes.
Q2: What type of chicken cuts work best with a panini press?
A2: Thin cuts like chicken breasts or cutlets shine brightest on a panini press-they cook quickly and evenly without drying out. You can also butterfly thicker breasts or pound them thin for consistent grill marks and speedy cooking. Boneless thighs work too, as long as they’re trimmed and flattened evenly.
Q3: How do I prep chicken for the panini press to ensure maximum flavor?
A3: Marinate your chicken ahead of time for a burst of flavor-think zesty lemon-herb, smoky barbecue, or spicy chipotle. If short on time, a quick rub of olive oil, salt, pepper, and garlic powder creates a simple, delicious crust. Draining excess marinade before grilling helps achieve those signature grill lines.
Q4: What temperature settings and timing should I use on the panini press?
A4: Preheat your panini press to medium-high-usually between 375°F to 400°F (190°C to 205°C). Grill chicken for about 4-6 minutes per side, depending on thickness. Use a meat thermometer to check for an internal temperature of 165°F (75°C) to guarantee it’s safely cooked yet juicy.
Q5: Are there any tricks to prevent the chicken from sticking to the plates?
A5: Absolutely! Lightly oil the plates or brush your chicken with a bit of olive oil before grilling. Non-stick panini presses help too, but even then, a little oil goes a long way to keep your masterpiece intact and the clean-up easy.
Q6: Can I use the panini press for more than just chicken?
A6: Definitely! Panini presses are incredibly versatile-you can grill veggies, press sandwiches, cook fish, or even make breakfast favorites like bacon and eggs. Experimenting with different foods turns your panini press into a kitchen multitasker.
Q7: How do I know when I’ve mastered the panini press chicken?
A7: When your chicken boasts beautiful grill marks, is juicy inside, and cooked in under 10 minutes, you’re a pro! Plus, when friends start asking for your secret recipe because your chicken tastes restaurant-quality, you’ve truly mastered panini press perfection.
Mastering chicken grilling with a panini press means fast, flavorful meals that transform everyday cooking into a creative adventure. Grab your press, your favorite chicken cuts, and get ready to impress with minimal effort and maximum taste!
To Conclude
Mastering the art of grilling chicken on your panini press transforms a simple cooking tool into a powerhouse of flavor and efficiency. With the right techniques, you can achieve perfectly charred, juicy chicken in a fraction of the time it takes on a traditional grill. Whether you’re crafting a quick weeknight dinner or impressing guests with gourmet sandwiches, the panini press unlocks a new dimension of culinary creativity. Embrace the sizzle, experiment with marinades, and watch as your kitchen becomes the ultimate hub for speedy, delicious meals-grilled chicken perfection is now just a press away.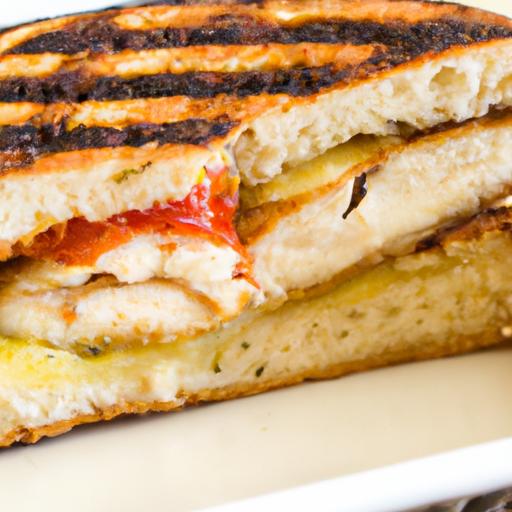

