In the culinary world, broth is the unsung hero-an elixir that transforms simple ingredients into soulful dishes. As busy lifestyles push us towards quick fixes, canned broth has become a pantry staple, promising convenience in a can. But can these ready-made options truly rival the rich, nuanced depths of a homemade simmered batch? In this broth showdown, we dive into the simmering debate between canned convenience and homemade flavor, exploring their flavors, nutrition, cost, and the subtle art of creating a broth that elevates every meal. Whether you’re a kitchen novice or a seasoned cook, this flavorful face-off will help you decide which broth deserves a spot in your next recipe.
Broth Showdown: Canned Convenience vs. Homemade Flavor
When it comes to making the perfect soup or stew, the Broth Showdown: Canned Convenience vs. Homemade Flavor raises an age-old question-should you reach for the quick canned option or embark on the slow simmering journey of homemade broth? Both have unique merits and challenges, but the difference in taste, nutrition, and culinary experience is profound. Today, we unlock the secrets behind broth’s nuanced flavors, health impacts, and kitchen tactics to help you choose perfectly every time.
Prep and Cook Time
- Preparation: 15 minutes
- Cooking (for homemade broth): 3-6 hours, depending on bones and desired richness
- Total time: 3 hours 15 minutes to 6 hours 15 minutes
Yield
Approximately 8 cups of broth
Difficulty Level
Medium (requires some patience but simple techniques)
Ingredients
- 3-4 pounds of beef bones (preferably marrow or knuckle bones for gelatin)
- 1 large onion, quartered (leave skin on for color)
- 2 carrots, roughly chopped
- 2 celery stalks, roughly chopped
- 5 garlic cloves, smashed
- 2 bay leaves
- 1 tablespoon black peppercorns
- 1 tablespoon apple cider vinegar (helps extract minerals from bones)
- Water (enough to cover bones about 2 inches)
- Salt to taste (optional, adjust after cooking)
Instructions
- Roast the bones: Preheat your oven to 425°F (220°C). Spread the bones on a large baking sheet and roast for 30-40 minutes, turning halfway, until deeply caramelized and fragrant. This step intensifies flavor and color.
- Transfer to stockpot: Place the roasted bones in a large stockpot. Add the onion, carrots, celery, garlic, bay leaves, and peppercorns.
- Add apple cider vinegar: Pour in the vinegar and then cover everything with cold water by about 2 inches. Let it sit for 20-30 minutes before turning on the heat-this pre-soak helps break down collagen.
- Simmer gently: Bring the pot to a slow boil, then immediately reduce to a low simmer. Skim any foam or impurities from the surface during the first hour to keep broth clear.
- Cook low and slow: Maintain a bare simmer for 3 to 6 hours. The longer you cook, the more depth, collagen, and minerals diffuse into the broth. Avoid boiling, which can cloud the broth and degrade flavor.
- Strain carefully: Remove the bones and vegetables with a slotted spoon, then strain the broth through a fine-mesh sieve or cheesecloth. Discard solids.
- Cool and store: Let broth cool to room temperature, refrigerate, and skim any congealed fat on top if desired for a leaner broth.
Chef’s Notes
- For a lighter broth, swap beef bones for chicken carcasses and cook for 2-3 hours.
- Vegetarian? Try simmering mushrooms, onions, garlic, carrots, and daikon for a rich umami base.
- If in a hurry, pressure cook your broth to harness flavor in about 1 hour.
- Leftover broth freezes beautifully in ice cube trays for quick portions.
- Adjust salt only at the end-not beforehand-to avoid over-seasoning concentrated broth.
Serving Suggestions
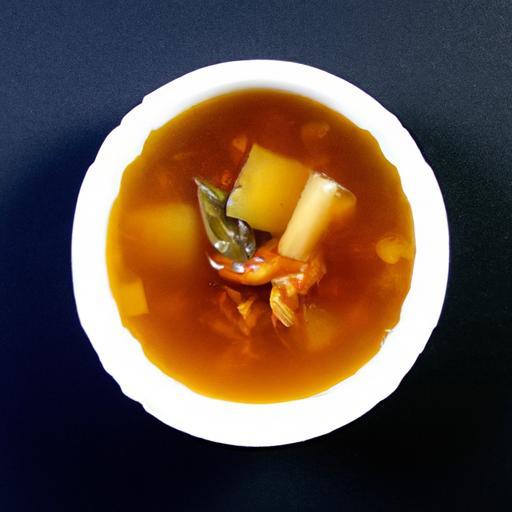
Homemade broth shines as a base for everything from comforting noodle soups to hearty stews. Serve it piping hot, garnished with fresh herbs like parsley or thyme, a squeeze of lemon zest to brighten the taste, or a drizzle of toasted sesame oil for complexity. Pair with crusty bread or use as a cooking liquid for grains to intensify flavor throughout your meal.
| Nutrient | Homemade Beef Broth (per 1 cup) | Canned Beef Broth (per 1 cup) |
|---|---|---|
| Calories | 45 | 30 |
| Protein (g) | 9 | 2 |
| Carbohydrates (g) | 1 | 4 |
| Fat (g) | 1.5 | 0.5 |
| Sodium (mg) | 100-150 (variable, adjustable) | 700+ (often high) |
Discover more soup recipes and kitchen tips in our Ultimate Soup Guide. For scientific insight into broth’s nutritional benefits, check out this comprehensive analysis from NCBI.

Q&A
Q&A: Broth Showdown – Canned Convenience vs. Homemade Flavor
Q1: What makes broth a kitchen essential?
A1: Broth is the flavorful foundation of countless dishes-from soups and stews to risottos and sauces. It adds depth, richness, and body, enhancing every bite with savory goodness.
Q2: Why do people turn to canned broth?
A2: Convenience is king in the fast-paced modern kitchen. Canned broth offers quick, ready-to-use liquid gold that saves hours of simmering. It’s shelf-stable, widely available, and consistent in taste.
Q3: Can canned broth match up to homemade broth in flavor?
A3: Canned broth is a great shortcut, but homemade broth often edges it out with complexity. Slow-simmered bones, fresh vegetables, and herbs meld together in homemade broth to create a richer, more nuanced bouquet that canned versions rarely replicate.
Q4: What about nutrition? Are there differences?
A4: Homemade broth typically contains more natural nutrients-collagen, minerals, and amino acids-gleaned from long, gentle cooking. Canned broth can be nutritious but might include added sodium, preservatives, or flavor enhancers.
Q5: How does cost factor in?
A5: While canned broth usually costs less upfront and wastes less time, homemade broth leverages inexpensive kitchen scraps and bones. The money investment can balance out when you consider flavor quality and homemade’s control over ingredients.
Q6: Which broth is better for dietary restrictions?
A6: Homemade can be tailored to fit dietary needs-low sodium, no additives, and allergen-free. Canned broths may contain hidden allergens, gluten, or excess salt, so labels must be read carefully.
Q7: Any tips for elevating canned broth?
A7: Absolutely! Enhance canned broth by simmering it briefly with fresh herbs, garlic, or vegetables to boost flavor depth. Add a splash of acid like lemon juice or vinegar to brighten the taste profile.
Q8: What’s the ultimate takeaway in this broth battle?
A8: Both have their place in the kitchen. For a quick fix, canned broth is a trusty ally. For slow-cooked dishes craving soul and substance, homemade broth reigns supreme. Knowing when to use each unlocks the full delicious potential of your cooking.
This is your broth showdown starter pack-choose your champion wisely!
The Conclusion
In the end, whether you reach for a can or simmer a pot on the stove, broth remains the unsung hero of countless recipes-each choice offering its own unique blend of convenience and character. Canned broth champions time-saving simplicity and pantry-ready reliability, while homemade broth invites you into a world of rich, customizable flavors, made all the more rewarding by the hands that craft it. So next time your recipe calls for broth, consider the story you want to tell in your dish: a quick, trusty base or a slow-simmered symphony? Either way, your taste buds are in for a flavorful journey. Cheers to the broth showdown-may your kitchen always be filled with warmth and delicious potential.


