There’s a special kind of magic in transforming simple ingredients-flour, water, yeast-into a warm, golden loaf of bread. Yet, for many, the art of kneading dough can feel like a daunting, time-consuming ritual reserved for seasoned bakers. Enter the humble bread machine: a kitchen marvel that takes the muscle out of kneading and invites both novices and experts alike to master dough making with ease. In this article, we’ll explore how to harness the full potential of your bread machine, turning the once laborious task of dough preparation into a hands-off, satisfying experience. Get ready to knead with ease and bring the comforting aroma of homemade bread right to your countertop.
- Prep and Cook Time
- Yield
- Difficulty Level
- Ingredients
- Understanding Your Bread Machine’s Dough Settings for Perfect Texture
- Selecting the Ideal Ingredients to Enhance Flavor and Rise
- Step by Step Guide to Kneading Dough Effortlessly with Your Bread Machine
- Troubleshooting Common Dough Problems and How to Fix Them
- Chef’s Notes and Tips for Success
- Serving Suggestions
- Q&A
- In Retrospect
Knead with Ease: Master Dough Making Using a Bread Machine
Knead with ease: master dough making using a bread machine and unlock the magic of perfectly textured bread dough every time. Combining technology with culinary finesse, a bread machine transforms the traditional and often intimidating task of dough preparation into a seamless experience. Whether you’re a beginner or a seasoned home baker, understanding your bread machine’s settings, choosing the right ingredients, and troubleshooting common issues can elevate your baking to artisan levels with minimal effort.
Prep and Cook Time
Preparation: 10 minutes | Rising: 1 hour 30 minutes | Cooking: 25 minutes
Yield
One large loaf (approximately 12 slices)
Difficulty Level
Easy – Perfect for novices and busy bakers alike
Ingredients
- 3 ½ cups bread flour, sifted
- 1 cup lukewarm water (about 110°F/43°C)
- 2 tbsp olive oil or melted unsalted butter
- 2 tbsp granulated sugar or honey
- 1 ½ tsp fine sea salt
- 2 tsp active dry yeast
- Optional: 1 tsp vital wheat gluten (for extra chewiness)
Understanding Your Bread Machine’s Dough Settings for Perfect Texture
The bread machine’s dough cycle is designed to replicate the vital steps of traditional bread-making: mixing, kneading, and rising. For perfect texture, select the “Dough” or “Basic” setting on your machine. This cycle carefully controls speed and timing, preventing over-kneading, which can make your bread dense and tough. Machines vary, so familiarize yourself with your model’s manual to identify whether it includes options like “Whole Wheat Dough” or “Rapid Dough”-these settings adapt times and temperatures to fit specific recipes. Start simple, then experiment as you gain confidence.
Selecting the Ideal Ingredients to Enhance Flavor and Rise
Choosing high-quality ingredients is the secret to flavor that sings. Bread flour is preferred for its higher protein content, which develops gluten, giving bread its signature chew and rise. For a honeyed sweetness and a softer crumb, swap granulated sugar for honey, but reduce the liquid slightly. To maximize yeast activity and achieve a rich, airy dough, use water at the ideal temperature (around 110°F). Salt modulates yeast and strengthens gluten; adding it at the right stage is crucial-always place it so that it doesn’t touch the yeast directly before kneading starts.
Step by Step Guide to Kneading Dough Effortlessly with Your Bread Machine
- Measure precisely: Use a kitchen scale for ingredients to ensure accurate ratios.
- Add liquids: Pour lukewarm water and oil into the bread machine pan first.
- Layer dry ingredients: Add sifted bread flour, spreading it evenly over the liquid.
- Place salt and sugar: Sprinkle on top of the flour, but keep salt away from yeast.
- Make a small well: Create a shallow depression in the flour for the yeast.
- Add yeast last: Place yeast in the well to keep it dry before mixing begins.
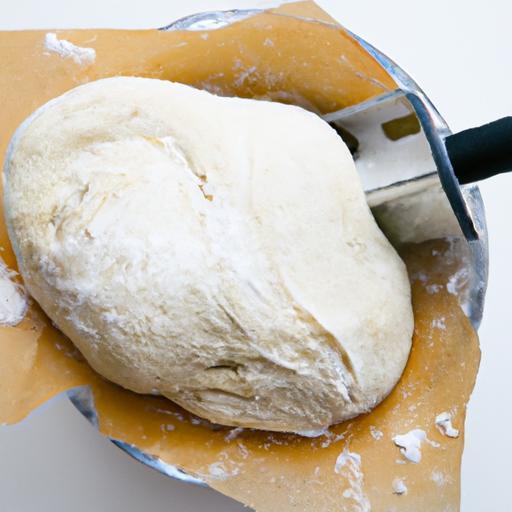
- Start the dough cycle: Close the lid and select the dough setting to begin mixing and kneading.
- Check consistency: After 5-7 minutes, open the lid briefly and inspect the dough. It should form a smooth, elastic ball. Add small amounts of flour or water if it’s too sticky or dry, one tablespoon at a time.
- Let the machine do its work: Trust the cycle for the proper kneading and first rise.
- Remove dough: Once complete, take out the dough for shaping and final proofing or baking per your recipe.
Troubleshooting Common Dough Problems and How to Fix Them
Sticky dough? Add flour sparingly-a tablespoon at a time-until you achieve a tacky but manageable texture. Dry, crumbly dough? Introduce a teaspoon of water gradually to soften it. Your dough’s rise feels sluggish? Check your yeast’s freshness, and ensure your water temperature wasn’t too hot or too cold. If the bread machine’s dough isn’t rising adequately, try placing the machine in a warmer spot or adjusting the rise time if your model allows. Pay attention to ingredient order, as premature salt contact with yeast can inhibit activation.
Chef’s Notes and Tips for Success
- Gluten boost: Add vital wheat gluten for superior chew, especially in whole wheat breads.
- Flavor twists: Mix in herbs, garlic powder, or roasted nuts during the initial mixing phase.
- Make-ahead: Refrigerate shaped dough overnight for a slow proof and more complex flavor before baking.
- Substitutions: For gluten-free options, refer to specific gluten-free bread machine recipes and dedicated gluten-free settings.
- Internal link: For shaping and baking tips, visit our Artisan Bread Shaping Techniques.
- External reference: For a deep dive into yeast science, explore ScienceDirect’s yeast overview.
Serving Suggestions
Enjoy your freshly baked bread warm, sliced thick and slathered with herb-infused butter, garlic oil, or your favorite fruit preserves. Garnish a loaf with a dusting of flour or sprinkle coarse sea salt and fresh rosemary on top before the final rise for a rustic aesthetic. Pair soft, fluffy doughs with creamy soups or robust stews to contrast texture and temperature, or craft gourmet sandwiches that capitalize on that perfect crumb.
| Nutrition (per slice) | Calories | Protein | Carbs | Fat |
|---|---|---|---|---|
| Classic White Bread | 120 | 4g | 22g | 1g |

Q&A
Q&A: Knead with Ease – Master Dough Making Using a Bread Machine
Q1: What’s the magic behind using a bread machine for kneading dough?
A1: The magic lies in automation! A bread machine mimics your hands’ rhythm, kneading dough consistently without tiring your arms. It mixes ingredients perfectly, creates elasticity, and develops gluten strands – all while you sit back and relax.
Q2: Can a bread machine really replace traditional hand-kneading?
A2: Absolutely! While hand-kneading connects you to the dough, a bread machine offers precision and time-efficiency. It ensures every batch gets equal love, producing dough with a perfect texture every time – no sore wrists required.
Q3: What types of dough can I master using a bread machine?
A3: The possibilities are vast! From fluffy white bread and hearty whole-grain loaves to pizza crusts and even sweet cinnamon rolls, the bread machine can handle all with expert kneading and rising cycles.
Q4: Are there any tips to optimize dough making with a bread machine?
A4: Yes, a few handy tips: Use room-temperature ingredients for best yeast activity; measure ingredients precisely; add yeast last to prevent premature activation; and don’t hesitate to pause and adjust if the dough looks too wet or dry during kneading.
Q5: How do I know when the dough is perfectly kneaded inside the machine?
A5: Many bread machines have a “dough” cycle designed for kneading and rising. You can also open the lid during kneading-quickly and carefully-to check if the dough forms a smooth, elastic ball that’s slightly tacky but not sticky.
Q6: Can I customize my dough recipes using a bread machine?
A6: Definitely! Once you master the basics, experiment by swapping flours, adding seeds, nuts, herbs, or even cheese. Your bread machine is a versatile partner in creativity, kneading up delicious innovations with ease.
Q7: What if the dough doesn’t rise properly after using the bread machine?
A7: Rise issues usually point to yeast problems-old yeast, water that’s too hot or cold, or insufficient kneading. Always check your yeast’s freshness, use proper water temperature (around 105-110°F/40-43°C), and trust the machine’s kneading cycle to develop that vital gluten structure.
Q8: Is cleaning the bread machine dough bucket easy?
A8: Yes! Most machines feature a non-stick bread pan and kneading paddles that pop off for quick rinsing. Just soak stubborn dough bits in warm water immediately after use to keep your machine happy and ready for the next bake.
Embrace the power of your bread machine and glide through kneading with ease. With patience and practice, you’ll soon be pulling warm, home-baked loaves from the machine like a true dough master!
In Retrospect
As the aroma of freshly baked bread fills your kitchen, you’ll realize that mastering dough with a bread machine is more than a convenience-it’s an art unlocked with the push of a button. From effortlessly blending ingredients to perfectly kneading and rising, this trusty appliance transforms dough-making from a daunting task into a delightful ritual. So, whether you’re crafting crusty artisan loaves or soft, pillowy buns, embrace the ease and consistency a bread machine brings, and let every loaf tell the story of your newfound baking confidence. Happy kneading, and even happier eating!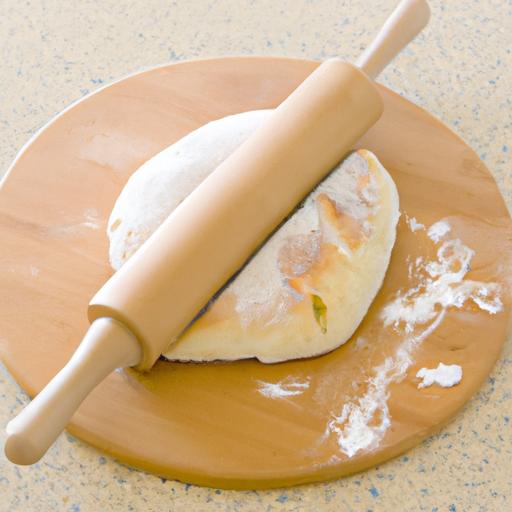


